HeliCoil Thread Insert
Features and Benefits
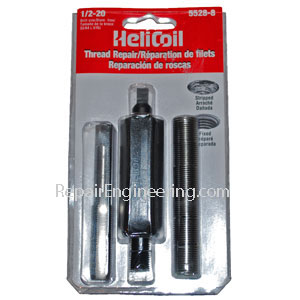
A HeliCoil is a coiled-wire type of thread repair insert used to create internal screw threads to accommodate standard-sized fasteners.
Some of the advantages of using a Helicoil include...
- Thread Size Range
A large range of available thread diameters allow for use in a variety of thread repair applications.According to published data, inserts are available as small as a #2 screw size, and as large as 1 1/2" diameter. Corresponding metric sizes are also available.
- Thread Type Selection
Inserts are available in various thread type and pitch configurations including UNC, UNF, Metric Coarse Pitch and Fine Pitch, UNEF, UNS, and Pipe Thread.Each insert is offered in several different length options.
- Material Options
Several material choices are available including Stainless Steel, Phosphor Bronze, Inconel X, Nitronic 60, and Titanium. A selection of finish coatings is also offered.
How It Works:
-
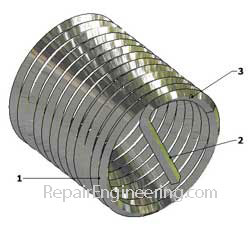
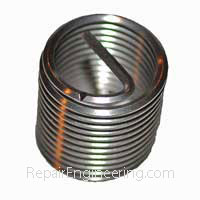
As its name suggests, a HeliCoil is a helically coiled stainless steel wire that has a diamond-shaped cross-section.
The wire cross-section allows the external portion of the wire to screw into the receiving threads in the housing during installation.
On the inner portion of the wire, the spacing between the coils of the insert form new conventional 60° threads.
The coils of the insert are compressed during installation as the insert is threaded into the housing.
Like a coiled spring, the compressed windings of the installed insert attempt to expand against the walls of the threaded housing. The resulting tension between the insert and the walls of the housing helps to retain the insert and keep it from unthreading.
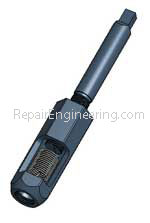
- The insert is provided with a drive tang that is used during installation to thread the insert into the receiving threads in the housing. A special installation tool engages the tang of the insert to drive it into the housing. Once installed, the tang is no longer needed, and is removed.
-
A small notch is formed into the insert that slightly reduces the coil cross sectional area at that location. When the time comes to remove the tang, the notch will cause it to break-off at that point.
Installation Instructions:
Installation Procedure:
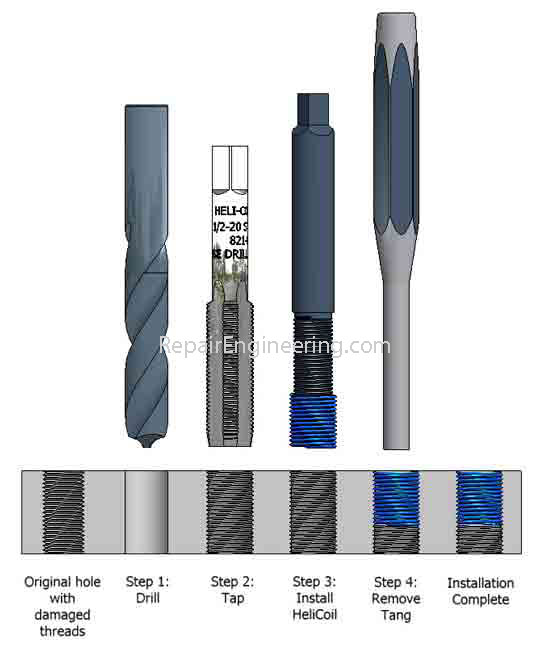
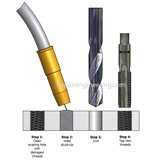
- Drill out the old threads using the drill size that is recommended on the thread repair kit packaging. The shank of the tap also lists the recommended drill size.
- Tap the hole using the Screw Thread Insert (STI) tap.
- Install the insert using the installation tool.
- For coarse-pitch threads, use the following procedure:
- Slide the insert onto the installation tool.
- Rotate the insert until the tang contacts the driver notch of the installation tool.
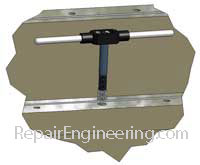
- Screw the insert into the STI threaded hole to the proper depth using a tap handle to rotate the installation tool.
- After the insert is seated to the proper depth, unthread the installation tool.
- For fine-pitch threads, use the following procedure:
- Use the pre-coil body supplied in the thread repair kit. The pre-coiler helps to compress the threads of the insert prior to installation in the housing.
- Slide the insert into the pre-coil body.
- Rotate the installation tool to thread it through the insert until the notch in the tool contacts the tang of the insert.
- Continue rotating the installation tool to wind the insert into the threaded end of the pre-coil body.
- Using one hand, hold the pre-coil body squarely against the surface of the workpiece over the tapped hole. Rotate the installation tool to drive the insert through the pre-coil body and into the tapped hole in the housing.
As the insert is installed, be sure to allow the pre-coil body to float as needed to allow the windings of the HeliCoil to align with the threads in the housing.
- After the insert is seated to the proper depth, unthread the installation tool.
Before beginning the HeliCoil installation process, look closely at the STI threads cut in the hole. Notice the location where the STI thread first starts to enter the hole.
Make a small temporary reference mark on the surface of the housing that is rotated 3/4 turn from the location where the STI thread first enters the hole. This mark is used determine the installed depth of the insert.
Install the insert using the process previously described, and screw the HeliCoil into the housing until the (non-tang) end of the insert is rotationally aligned with the temporary reference mark.
Following this process, the top of the insert is installed 1/4 turn below the top surface of the housing.
If a deeper seating of the insert is desired, rotate the installation tool up to 1/4 additional turn.
- Remove the tang of the insert.
- Use a punch or a piece of round bar stock that fits snugly into the inside diameter of the installed insert.
The end of the punch or bar should have a square end (without a chamfer).
- Allow the bar or punch to rest against the tang of the insert, and hold it squarely in the hole.
Strike the end of the tool with a sharp tap with a hammer. The tang should break-off at the notch in the insert that is designed for that purpose.
On larger diameter inserts, it is sometimes easier to use a pair of needle-nose pliers to twist-off the tang.
- Recover the tang from the housing prior to re-assembling the machine.
Repair Tip:
One of the reasons that HeliCoils fail in service is that they are improperly installed initially.
A good rule-of-thumb is to install the HeliCoil so that the top of the insert is 1/4 to 1/2 turn below the top surface of the workpiece. One easy way to determine the installed depth is detailed below...
Questions and Answers: Why does the installation of a HeliCoil require the use of an STI tap? What is an STI tap? Can a standard tap be used instead?
Once installed, the internal threads of the HeliCoil insert are designed for use with standard sizes of fasteners. To work correctly, the spacing of the coils of the HeliCoil wire is installed with the same pitch (spacing between threads) as the fastener for which it is intended.
Because the external thread diameter and pitch is determined by the dimensions of the installed fastener, the resulting external thread does not correspond with a standard tap size.
A "Screw Thread Insert Tap" (also known as an STI Tap) is designed specifically to be used in the installation of some types of thread inserts, including HeliCoils. An STI tap is different than a standard fastener thread tap; they can not be used interchangeably.
To illustrate the difference between a standard tap and an STI tap...
A standard tap used to create threads for a 1/2" NF fastener has a major diameter of .500" with a pitch of 20 threads per inch.
The corresponding STI tap for that particular insert has the same thread pitch of 20 threads per inch, but has a larger major diameter. (In this example, the STI tap major diameter measures .568".)
Rather than just relying on the HeliCoil spring tension to retain the insert, is there any way to positively lock the insert into the housing threads?
- Apply a light coating of Loctite Thread-Locker compound to the external portion of the coils of the insert prior to threading it into the housing. If this method is used, be sure not to apply too much Loctite and be sure to wipe the internal threads of the HeliCoil insert clean after it is installed so that the fastener does not bond to the insert.
- Using a punch and hammer, peen the threads of the housing slightly at the (non-tang) end of the installed insert. The intent with this method is to slightly deform, or compress the housing thread to make it more difficult for the insert to accidently back-out of the housing.
The following methods are recommended to help secure an insert into the housing...
Return to HeliCoil Top
Impeller
Repair Project
 Impeller Repair
